

A new pool does not begin with excavation. It begins when a homeowner looks at the backyard and realizes it could do a lot more – more family time, more relaxation, more value, and a lot more enjoyment in the Florida heat. Understanding the pool installation process upfront makes the entire experience feel more manageable, especially when you know what happens next, what can affect the schedule, and where expert guidance makes the biggest difference.
For many Tampa Bay homeowners, the biggest question is not whether to build a pool. It is how the process actually works from first conversation to first swim. The answer is straightforward when the project is handled the right way, but there are still a few moving parts that deserve a clear explanation.
The pool installation process starts with design
Every backyard has its own possibilities and limitations. Lot size, home layout, drainage, access, setback requirements, and intended use all shape the design. A pool built for weekend entertaining may need a different footprint than one designed around daily family use, lap swimming, or a compact plunge pool concept.
This early phase is where the project gets exciting, but it is also where practical decisions matter most. Homeowners typically choose the pool shape, depth profile, finish materials, coping, decking, water features, lighting, automation, and any surrounding outdoor living elements such as a spa, sun shelf, fire feature, patio, or outdoor kitchen. Good design is not just about appearance. It is about how the entire space functions once construction is complete.
A well-planned design also helps avoid expensive changes later. When the vision, budget, and construction approach are aligned from the beginning, the build tends to move with fewer surprises.
Site evaluation, engineering, and permits
Once the design direction is established, the next step is confirming that the plan works on paper and on the property. This stage includes measurements, site review, and engineering considerations that support structural integrity and code compliance. In Florida, this matters even more because soil conditions, drainage, storm considerations, and local regulations all affect how a pool should be built.
Permitting is often the part homeowners underestimate. It can take time, and timelines depend on the municipality, project scope, and review process. In areas across greater Tampa Bay, permit turnaround can vary, which is one reason realistic scheduling matters. A trustworthy builder will set expectations here instead of promising a speed that the permitting office cannot support.
If the project includes screen enclosures, electrical upgrades, gas lines for a heater or fire feature, or major hardscape work, those details may also factor into approvals and sequencing. This is where having one experienced team coordinate the job can make the entire experience feel far less stressful.
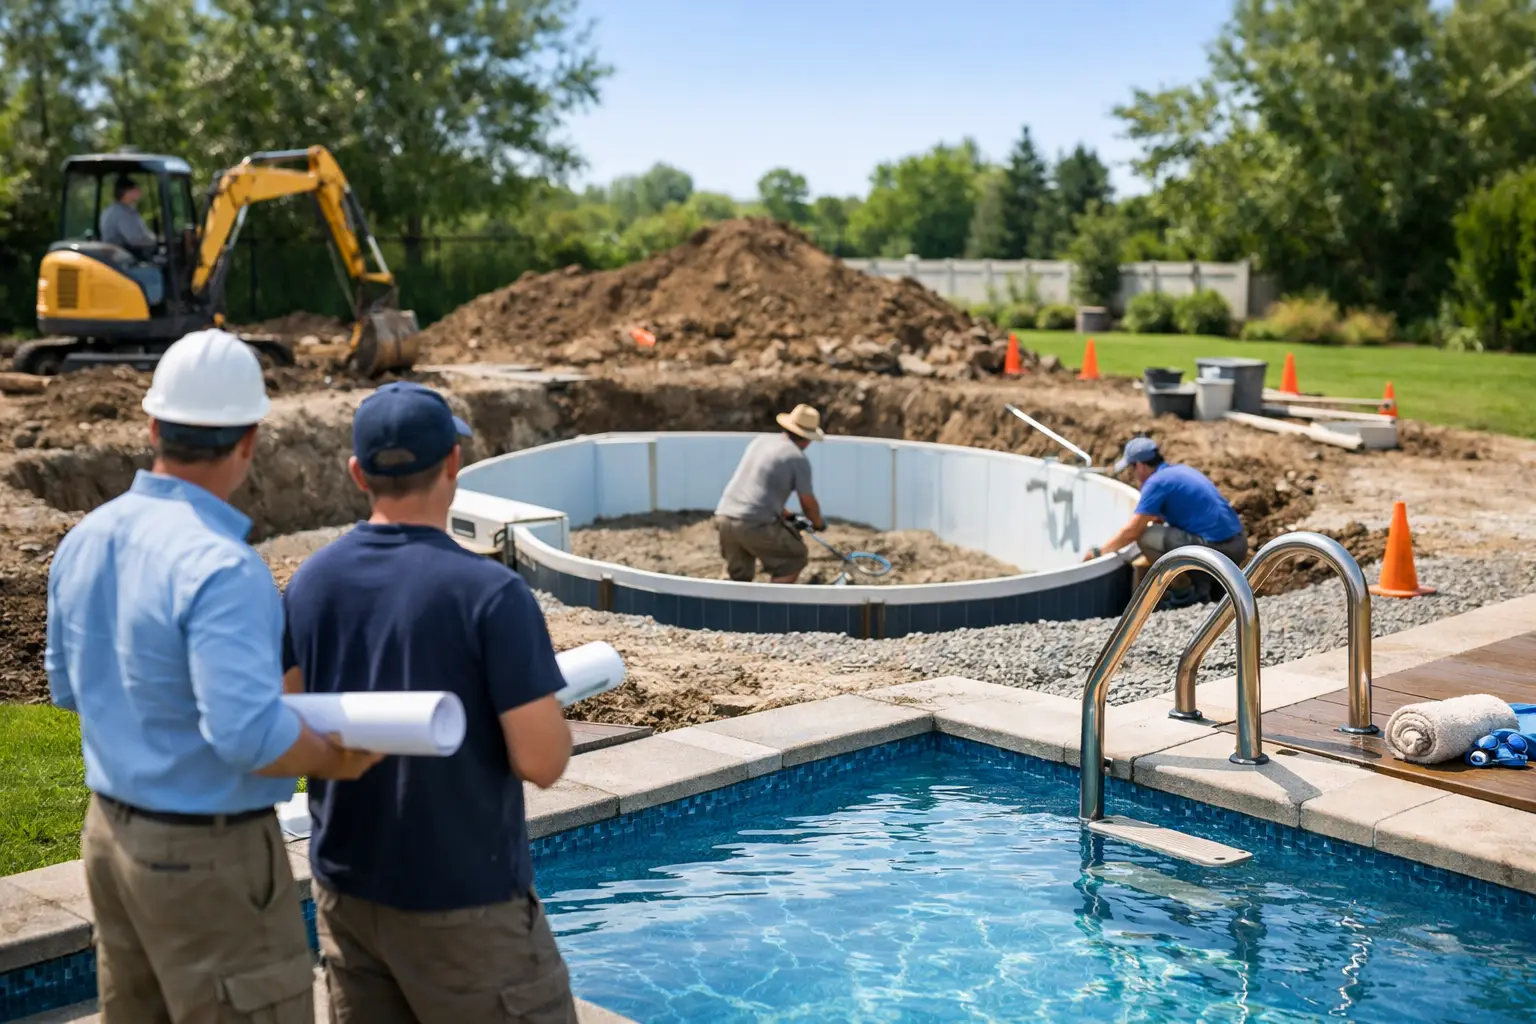
Layout and excavation
After approvals are in place, the backyard starts to look like a construction site – because now the transformation becomes visible. The pool layout is marked on the ground so the homeowner and builder can confirm final placement before digging begins. This is an important checkpoint. Adjustments are much easier before excavation than after.
Excavation is typically one of the fastest phases, but it is also one of the messiest. Heavy equipment removes soil based on the approved design, and access to the yard plays a major role in how simple or complex this step will be. A tight side yard, existing structures, fencing, or landscaping can all affect equipment access and labor.
Florida weather can also influence this phase. Rain can slow progress, soften soil, and impact site conditions. That does not mean the project is off track. It simply means the schedule should account for real-world construction conditions rather than ideal ones.
Steel, plumbing, and electrical rough-in
Once the hole is excavated, the shell begins taking shape. Steel reinforcement is installed to create the structural framework of the pool. This steel must be placed precisely according to engineering requirements because it helps the finished shell withstand ground pressure and long-term use.
After steel comes the rough-in for plumbing and electrical systems. Pipes are positioned for circulation, skimmers, drains, returns, water features, and spa jets if the design includes them. Electrical work supports lighting, automation, pumps, heaters, and other equipment. This phase is less exciting visually than excavation, but it is one of the most important parts of the build.
When plumbing and electrical systems are installed correctly, homeowners benefit long after construction ends. Better circulation, efficient equipment operation, and easier maintenance all begin here. This is also why cutting corners during installation tends to show up later in the form of repairs, performance issues, or higher operating costs.
Gunite or shotcrete application
At this stage, the shell is formed using sprayed concrete, commonly gunite or shotcrete depending on the application and method used. This creates the hard structure of the pool. For many homeowners, this is the moment the project finally feels real. The shape they saw on paper is now in the ground.
After the shell is applied, it needs time to cure. That curing period is essential to long-term durability. Rushing it is never worth it. While homeowners are often eager to move ahead quickly, this is one of those places where patience protects the quality of the investment.
It is also common for the site to look unfinished for a little while during this period. That can feel uncomfortable if you are expecting constant visible progress every day. In reality, quality construction includes stages where the right next step is simply allowing materials to set properly.
Tile, coping, decking, and outdoor living features
Once the shell is ready, the project starts to shift from structural work to finished surfaces. Waterline tile and coping are installed first, helping define the pool’s visual character. This is where contemporary, resort-inspired design choices begin to stand out.
Decking follows, and the material selection affects both appearance and usability. Travertine, pavers, concrete finishes, and other deck materials all offer different looks, heat performance, maintenance needs, and price points. There is no universal best choice. It depends on style preferences, budget, and how the space will be used by kids, guests, and pets.
If the project includes integrated features such as a spa, fire bowls, a tanning ledge, a patio extension, or an outdoor kitchen, those elements are often coordinated during this phase as well. This is one reason many homeowners prefer an end-to-end approach. The backyard feels more cohesive when the pool and the surrounding living space are designed and built as one environment instead of as separate projects.
Interior finish, fill, and startup
The interior finish is one of the final major steps in the pool installation process. Whether the homeowner selects plaster, quartz, pebble, or another finish, the choice affects appearance, texture, durability, and maintenance expectations. Premium finishes often come with a higher upfront cost, but they may offer longer-term aesthetic and performance benefits.
After the interior is applied, the pool is filled with water and the startup process begins. Equipment is tested, water chemistry is balanced, and the system is checked for proper performance. Pumps, filters, heaters, lights, and automation controls should all be reviewed so the homeowner understands how everything works.
This handoff matters. A beautiful pool is only part of the result. Homeowners also need confidence in operating and caring for it. That is especially true for busy families who want the space to feel easy to enjoy, not complicated to manage.
How long does the pool installation process take?
This is the question every homeowner asks, and the honest answer is that it depends. Pool size, design complexity, permitting, weather, material availability, site access, and added features all influence timing. A compact plunge pool may move faster than a large custom pool with a spa, elaborate decking, and multiple outdoor living upgrades.
That said, speed and quality should work together, not against each other. A fast timeline is appealing, but not if it creates mistakes or communication gaps. The better standard is a clear schedule, realistic updates, and a builder who manages each phase with accountability. For homeowners who want efficiency without losing confidence in the final result, that balance is what matters most.
What homeowners can do to keep the project moving
The best pool projects are collaborative. Homeowners do not need to manage construction, but they do help the process by making selections on time, asking questions early, and staying aligned on budget and priorities. Delays often happen when finish choices, change orders, or added features are introduced late in the schedule.
It also helps to think beyond installation. Equipment efficiency, maintenance access, safety features, and future service support should all be part of the conversation before the build is complete. A pool is not just a construction project. It is a long-term part of how the home functions.
That is why many families choose a company like Wahoo Pools to design, build, and support the backyard from start to finish. When one team owns the process, the design intent stays intact, communication stays cleaner, and the transition from construction to ongoing care feels much more natural.
The right pool should feel exciting before construction starts, organized while it is underway, and easy to enjoy once it is finished. If you are planning your backyard transformation, the best next step is not to rush. It is to work with a team that knows how to build your dream with clarity from day one.